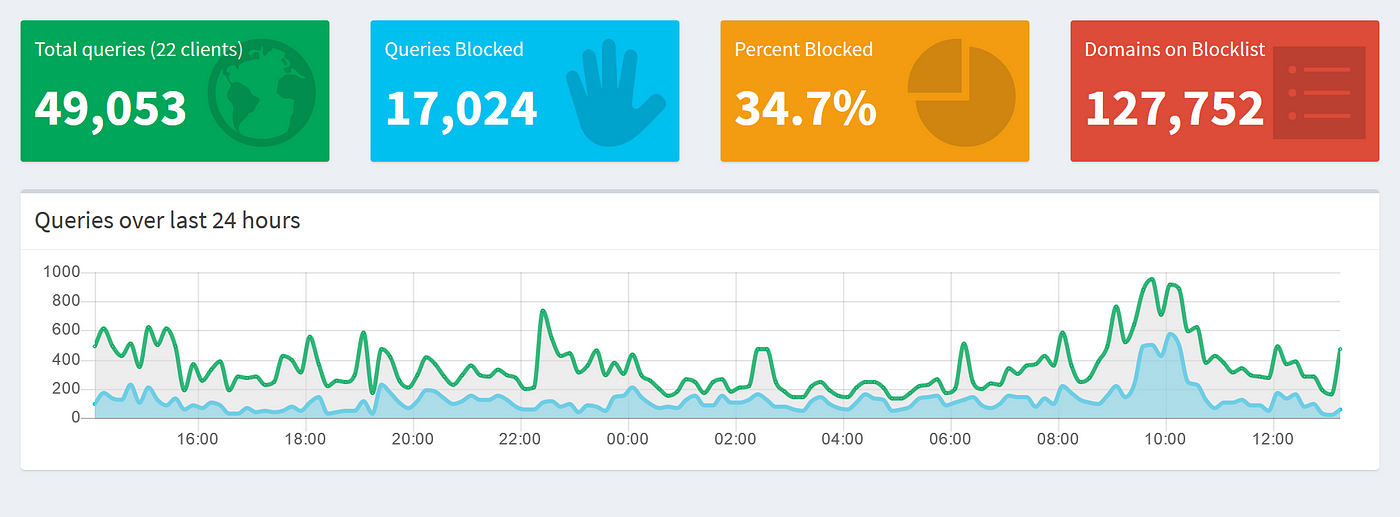
Ok, ok, I know it sounds crazy! But please, hear me out on this one. What we are going to do is take a Pi 4, install Raspbian Lite, PiHole, Squid, Webmin, and AutoSSH. With these things and a free instance in Google Cloud Platform we can have some fun!
Hardware and Initial Setup
First things first, we need to gather up the hardware we need. I’m using a Raspberry Pi 4 to get the true gigabit connection but this will work on all models with a few different tweaks. Other than the Pi, we need ethernet cable, micro sdcard, power connector, and case/accessories of your choice. We also need an internet connected computer to download Raspbian Lite.
Now that we have all of our stuff. Let’s get started with downloading. Head over to https://www.raspberrypi.org/downloads/raspbian/ and download Raspbian Buster Lite (or the most recent one if something is newer)
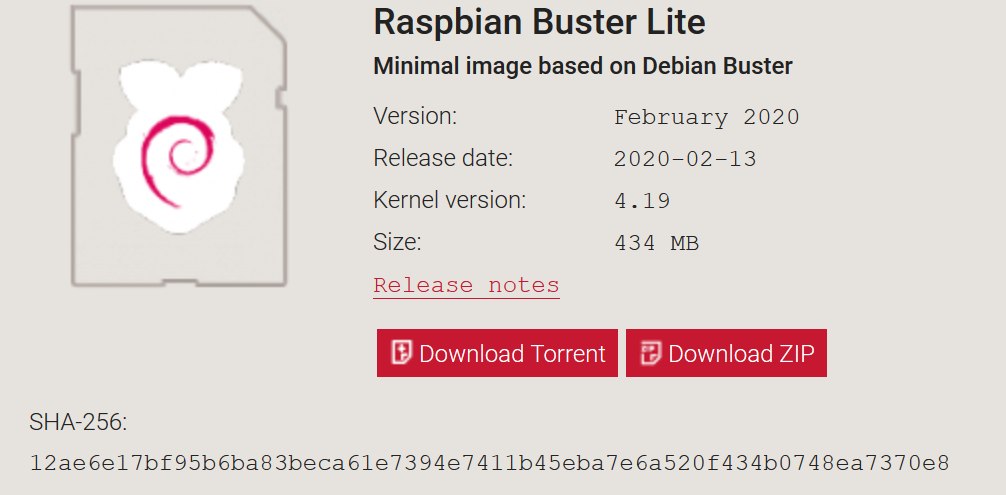
Once this is downloaded we need to copy it over to our sdcard. There are a few ways to do this and the amazing people over at raspberrypi.org wrote excellent directions based on whichever operating system you are using. Once the copy is completed we need to add one thing to our boot partition. Create an empty file and name it “SSH”. This will enable ssh on first boot and you can use the Pi completely headless.
Now that we have this all done, connect directly to your main switch/router/connection to the outside world and power on.
After a bit of time you can check your DHCP server for what IP address your device was allocated. We can then ssh over with
$ ssh pi@ip_addressOnce we are logged in there are a few things I recommend doing before proceeding.
$ sudo raspi-configEnsure locale and any other specific things you want are configured. Also we need to go into advanced settings and allocate less memory for GPU to ensure our little device has the most RAM it can have to accomplish tasks. I am using 16 on my Pi4 but on lower models I suggest 8.
Next we need to do the obligatory
$ sudo apt-get update && sudo apt-get -y upgrade && sudo apt-get -y dist-upgradeThis will ensure we are all up -to-date before we begin.
Still with me? If so, awesome, if not, well, you’re not reading so it doesn’t matter. From here I’m going to install pre-requisites for pihole, webadmin, and squid. I am going to be running squid as a web caching proxy, pihole to block all the ads, and webadmin to manage the pi remotely from a browser. I will list which items are for which so you can exclude items if you don’t want the services.
Pi-Hole

First, let’s begin with Pi-Hole!
$ sudo apt-get -y install git
$ git clone --depth 1 https://github.com/pi-hole/pi-hole.git Pi-hole
$ cd "Pi-hole/automated install/"
$ sudo bash basic-install.sh
The installation for Pi-hole is very straight forward. Follow the on-screen prompts, answer questions, and you are good to go. Once we have this setup and configured how we want there are a couple changes we need to make.
First, I’m going to modify lighttpd to only listen on localhost.
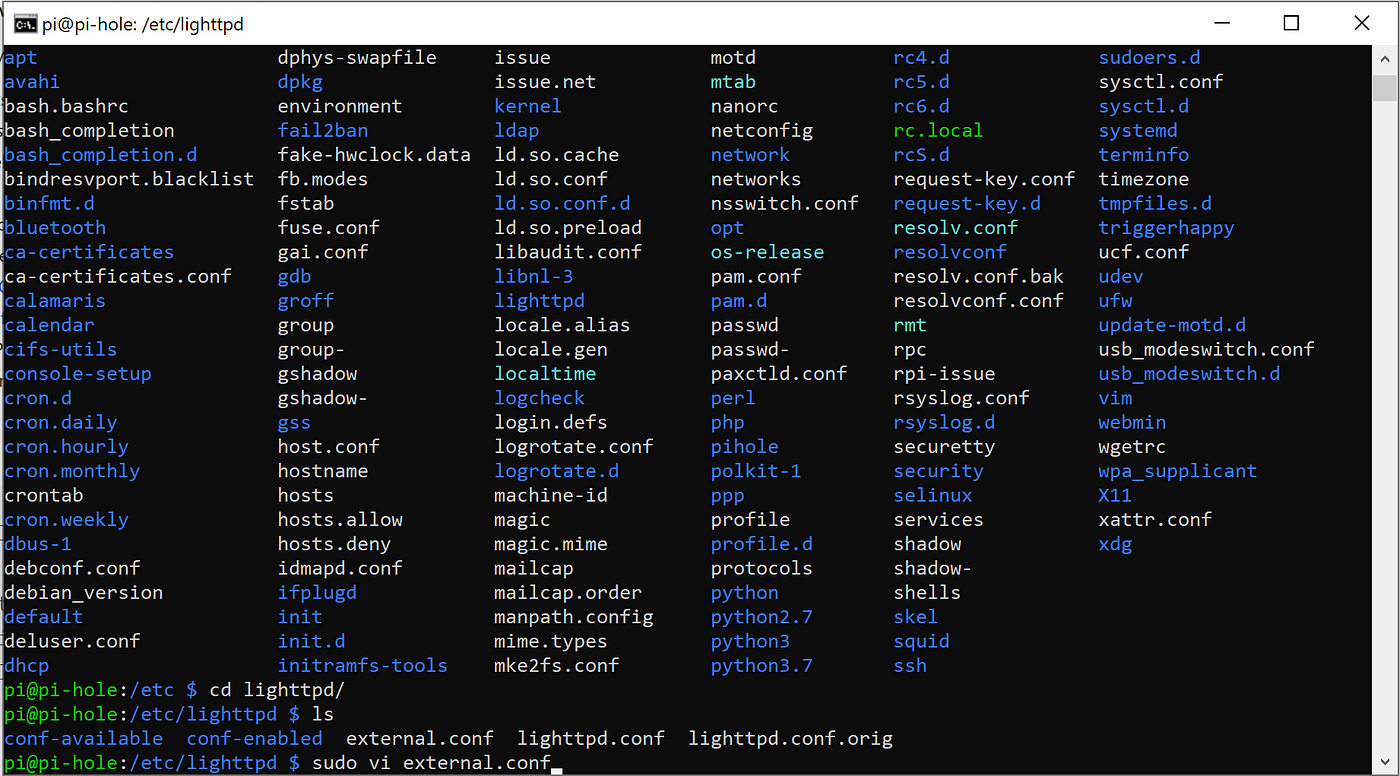
To do this we need to do the following:
$ sudo vi /etc/lighttpd/external.confFrom here we just add the line:
server.bind="127.0.0.1"Save the file and restart the service.
$ sudo systemctl restart lighttpd.serviceWe aren’t finished. If you notice, this will not allow you to access your device through a proxy. To remedy this problem we need to edit another file.
$ sudo vi /var/www/html/pihole/index.htmlWe need to change line 10 to match the following
$serverName = htmlspecialchars($_SERVER["SERVER_ADDR"]);We also need to edit auth.php
$ sudo vi /var/www/html/admin/scripts/pi-hole/php/auth.phpUnder the following section you MAY need to add your FQDN to ensure all configuration changes, logins, etc through the proxy function. You can test as needed.
$AUTHORIZED_HOSTNAMES = array(
        $ipv4,
        $ipv6,
        str_replace(array("[","]"), array("",""), $_SERVER["SERVER_NAME"]),
        "pi.hole",
        "localhost"
    );
For me, I needed to ensure localhost was listed since we are using localhost to access the server through the proxy.
We are now able to access the dashboard through a proxy. If this is all you want to implement, skip ahead to the Google Cloud configuration and the AutoSSH configuration. For now, I’m going ahead into squid and webmin.
Squid

Squid is a web cache proxy. I LOVE it! Anyway, how I configure it works really well for me, you can honestly adjust everything as you like.
To begin we need to install squid and all the parts of it we will be using later.
Since we have Pi-Hole installed we don’t need to worry about a static ip address. If you are only here for squid, well, USE STATIC IP!
$ sudo apt-get -y install squid squid-cgi calamaris squidclientThis will require some additional packages but they will be installed with these.
I’m using squid-cgi to view data via webmin. If you don’t wish to use webmin you can just go with squidclient and monitor via command line*
Let’s get to configuring our proxy!
Best thing to do at the start is backing up the default configuration in case we mess up everything.
$ sudo cp /etc/squid/squid.conf /etc/squid/squidoriginal.conf.bakNow we need to edit the config. Here there are only a few options to enable/change. I prefer vim if you haven’t noticed from previous things or even my usage here. To search you just use a ‘/’. If you prefer nano you need to use ‘ctrl’ + ‘w’. Either way find the sections and edit/add lines as needed. Most of these are editing current ones minus the acl ones.
First thing first! ACL! Most private CIDR address spaces are covered. I recommend commenting all of these out and adding your own to reflect your network. Mine is:
acl localnet 192.168.2.0/24Ensure we have the acl allowed
http_access allow localnetNow adjust dns
Find: # dns_v4_first off remove the # symbol and change off to on.The remaining changes I’m making are as follows:
Cache_mem 256
MBMaximum_object_size 4096
MBMaximum_object_size_in_memory 8192
KBCache_dir ufs /var/spool/squid = 8192
Now we save and exit. Then we backup this configuration just to be safe.
$ sudo cp /etc/squid/squid.conf /etc/squid/mysquid.conf.bakAfter this we can start our proxy
$ sudo systemctl start squidSquid is now up and running! From here I’m going to configure webmin to manage this as well the rest of my pi remotely. You can leave it here or continue along.
Webmin

So.. personally, I’m not the biggest fan of this software. I think it is a lot of overkill for what we need. It does however make things very easy. We are going to cheat in installing this a bit. It seems odd but trust me, it makes our life easier.
$ cd ~
$ mkdir webmin-download
$ cd webmin-download
$ wget http://www.webmin.com/download/deb/webmin-current.deb
$ sudo dpkg -i webmin-current.deb
This is going to error saying we are missing dependencies. That’s perfect. We want that to happen. Now we can go ahead and install dependencies and webmin with the following:
$ sudo apt-get -f installNow webmin is all installed as well as our required packages. Simple right?!
We do have some configuration to do here to allow us to manage squid from webmin as well as make it only listen on localhost.
Let’s browse over to our Pi and open the webmin page.
The login will be username and password of your pi. By default this is pi:raspberry.
Next we need to go to the left and find squid under unused modules section. In here we need to adjust the paths to everything and adjust the startup, stop, and restart script sections.
The highlighted sections you will need to make match your install. For my install I had to change all from squid3 to squid and the scripts all to the corresponding systemctl ones. For example:
service start squidchanges to
systemctl start squidI’m confident you can change the rest. Depending on webmin version you will have some additional prompts to change. I had none.
We can now manage our squid server via webmin and add more things as well as adjust ssh settings, monitor pi, and all sorts of fun little things. From here we are going to make some additional adjustments for our installation to only listen locally and work through a proxy server.
The MOST important thing is to adjust access controls.
In here we want to go to proxy restrictions tab and ensure manager is not denied. If so, we will not be able to access settings once we connect to our proxy server.
This is what mine looks like:

From here we are going to go into webmin configuration. Look to the left pane and click webmin section and select webmin configuration.
In this section we will be disabling SSL. The other options are easier to do in the config file itself. We can actually do all of these changed in config files but selecting a radio button I find easier than searching for a line in a config file and editing.
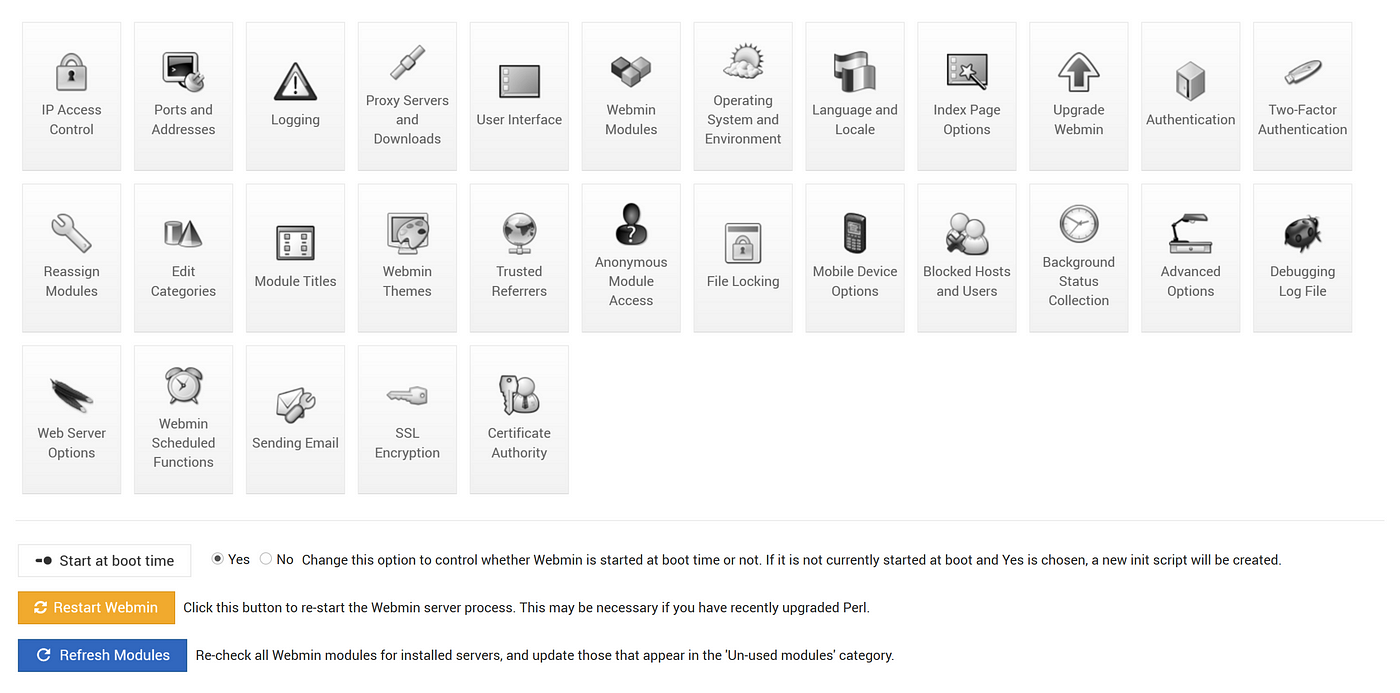
Select SSL Encryption and under Enable SSL? select NO
Yes, I know this seems like a bad idea, but don’t worry. We are going to handle our own SSL later.
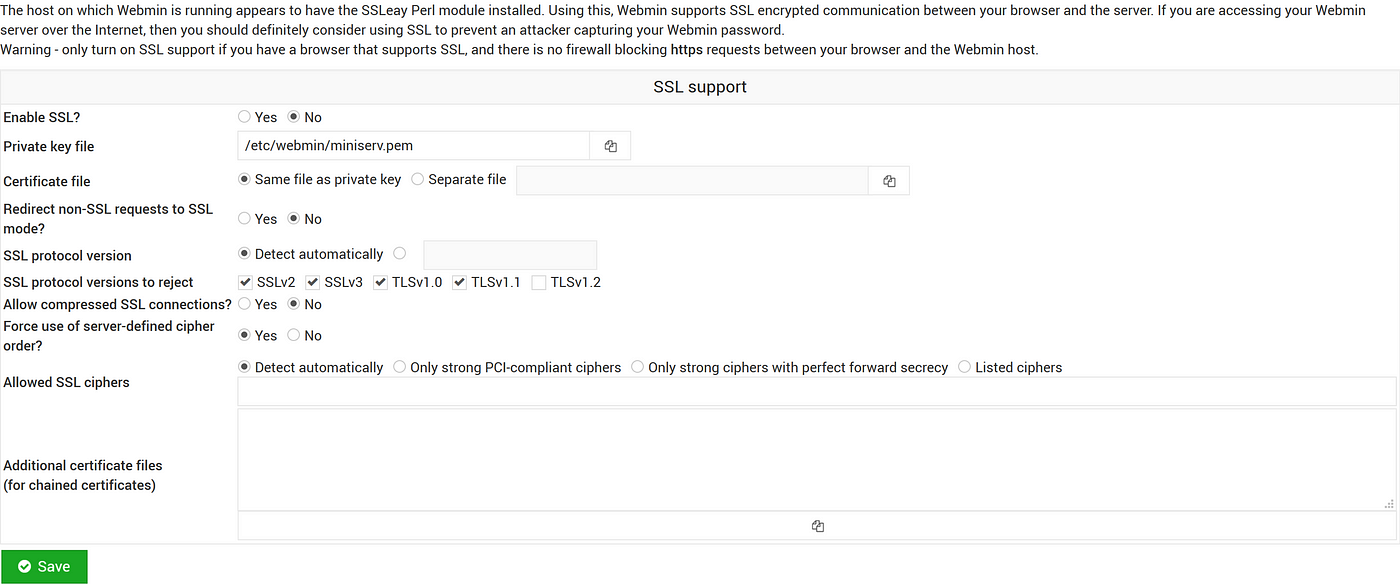
Save settings and we are now going to ssh into our pi. From here we will execute the following:
$ cd /etc/webmin
$ ls 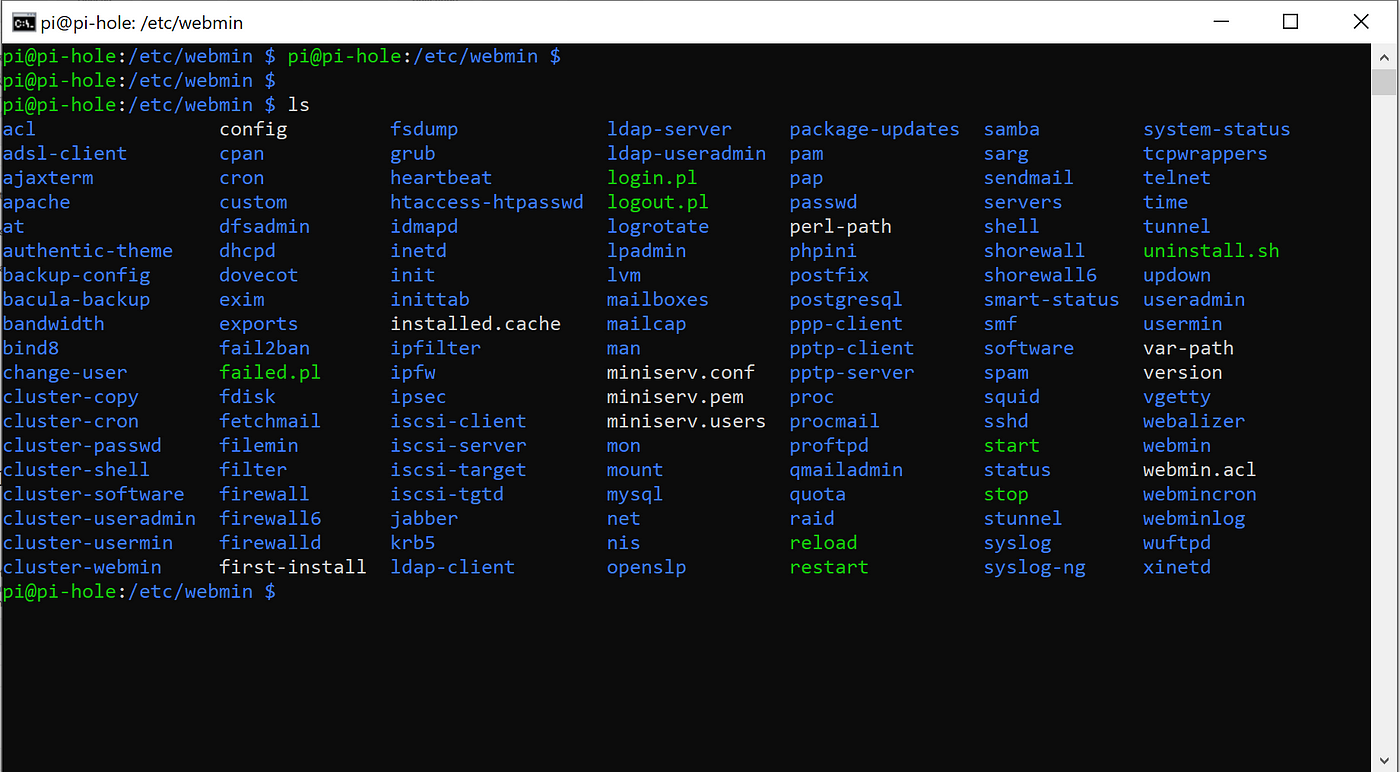
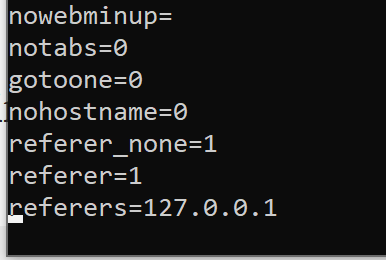
We need to edit the file called config and add some lines to the bottom.
$ sudo vi configWe will then add the following:
referer_none=1
referer=1
referers=127.0.0.1
Once this is done, save file and exit. Now restart webmin
$ sudo systemctl restart webmin
We will now only be able to access our webmin page via proxy.
Time to get started with SSL. We are going to setup our own CA here and generate some user certificates. I know this guide is a bit long but this part ensures all ourinternet accessible stuff is as secure as possible.

I HIGHLY recommend you put your CA on a non-internet connected device. If you must put it on something that is connected, ensure you secure things. If your CA is compromised your organization is compromised. The guide I’m giving is on Linux using OpenSSL. There are a lot of things that are up to personal preference and you can adjust as you see fit.
You can do all of this in whatever directory you choose. I’m just working in /root and will be giving a very quick setup. First we need to create our openssl.conf. Mine looks like this:
[ ca ]
default_ca = CA_default                 # The name of the CA configuration to be used.
                                        # can be anything that makes sense to you.
[ CA_default ]
dir = /etc/ssl/ca                       # Directory where everything is kept
certs = $dir/certs                      # Directory where the issued certs are kept
crl_dir = $dir/crl                      # Directory where the issued crl are kept
database = $dir/index.txt               # database index file.
#unique_subject = no                    # Set to 'no' to allow creation of
                                        # several certificates with same subject.
new_certs_dir = $dir/certs              # Default directory for new certs.

certificate = $dir/ca.crt               # The CA certificate
serial = $dir/serial                    # The current serial number
crlnumber = $dir/crlnumber              # The current crl number
                                        # must be commented out to leave a V1 CRL
crl = $dir/crl.pem                      # The current CRL
private_key = $dir/private/ca.key       # The private key
RANDFILE    = $dir/private/.rand        # private random number file

x509_extensions = usr_cert              # The extentions to add to the cert

name_opt = ca_default                   # Subject Name options
cert_opt = ca_default                   # Certificate field options

default_days     = 365                   # how long to certify for
default_crl_days = 30                    # how long before next CRL
default_md       = sha1                  # use public key default MD
preserve         = no                    # keep passed DN ordering

policy = policy_match
You obviously will want to adjust things as needed here for your configuration. Now I’m going to create some files. Again, I’m logged in as root.
mkdir -p /etc/ssl/ca/certs/users && \
mkdir /etc/ssl/ca/crl && \
mkdir /etc/ssl/ca/private
Next, we’ll create the reference files for the configuration. The database index file can be created empty. The CRL number file, on the other hand, will be expected by OpenSSL to have the first number in it:
touch /etc/ssl/ca/index.txt && echo ’01’ > /etc/ssl/ca/crlnumberFinally, we’ll create our server certificates and the certificate revocation list for the CA. We’ll set an expiration of one year in our example. Again, you can set this up however you like based on your environment.
openssl genrsa -des3 -out /etc/ssl/ca/private/ca.key 4096

openssl req -new -x509 -days 1095 \
    -key /etc/ssl/ca/private/ca.key \
    -out /etc/ssl/ca/certs/ca.crt

openssl ca -name CA_default -gencrl \
    -keyfile /etc/ssl/ca/private/ca.key \
    -cert /etc/ssl/ca/certs/ca.crt \
    -out /etc/ssl/ca/private/ca.crl \
    -crldays 1095
Whew! We got that done. Now to get to generating user certificates.
All we need to do is the following:
openssl genrsa -des3 -out /etc/ssl/ca/certs/users/USERNAME.key 1024

openssl req -new -key /etc/ssl/ca/certs/users/USERNAME.key \
    -out /etc/ssl/ca/certs/users/USERNAME.csr

openssl x509 -req -days 1095 \
    -in /etc/ssl/ca/certs/users/USERNAME.csr \
    -CA /etc/ssl/ca/certs/ca.crt \
    -CAkey /etc/ssl/ca/private/ca.key \
    -CAserial /etc/ssl/ca/serial \
    -CAcreateserial \
    -out /etc/ssl/ca/certs/users/USERNAME.crt

openssl pkcs12 -export -clcerts \
    -in /etc/ssl/ca/certs/users/USERNAME.crt \
    -inkey /etc/ssl/ca/certs/users/USERNAME.key \
    -out /etc/ssl/ca/certs/users/USERNAME.p12
Obviously adjust names, paths, etc based on what you are doing. If everything was configured correctly, we are 100% good to go!! Remember based on OpenSSL versions, Linux distribution, etc your experience may vary. This is only a rough guide on how to do this.
To the cloud!!

You can use any cloud platform or even a server with static IP address for this part if you choose. I’m going with Google Cloud Platform because, well, there is a free tier that is perfect for this type of thing. This is going to be a guide on setting up your instance, installing nginx, configuring nginx, and setting up SSL. We will need some things from our CA in a bit. Google Cloud Platform Google Cloud Platform lets you build, deploy, and scale applications, websites, and services on the same infrastructure… console.cloud.google.com
Here you will need a Google account. If you are averse to Google, I apologize. Once here, you will need to setup billing. What we are doing is in the free tier so you won’t be charged BUT you need to have billing configured to allow creation of the things we are doing. Once your cloud billing and account is all setup we can begin.
We need to create a new project. Once you have your project created we need to click on compute engine in the left side menu.
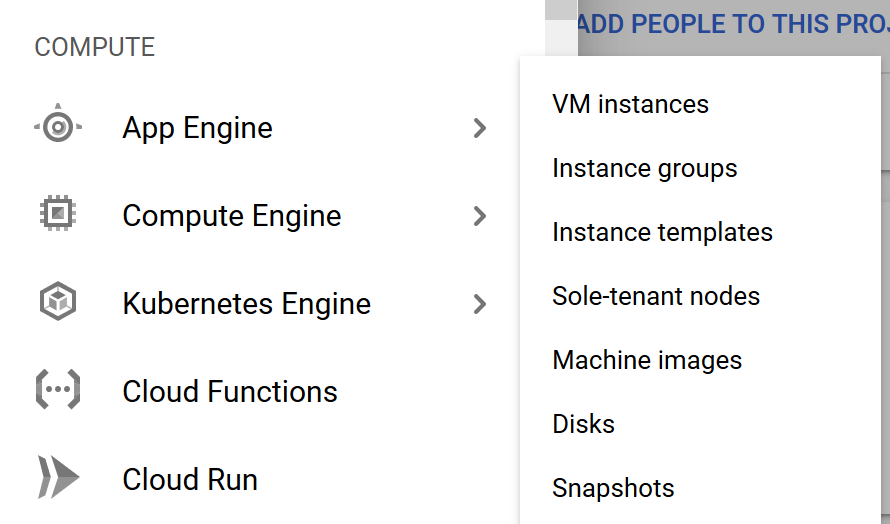
Don’t worry about the submenu. We are just going to Compute Engine section. On the top of this page we need to select Create Instance

You will be greeted by a page that looks something like this:
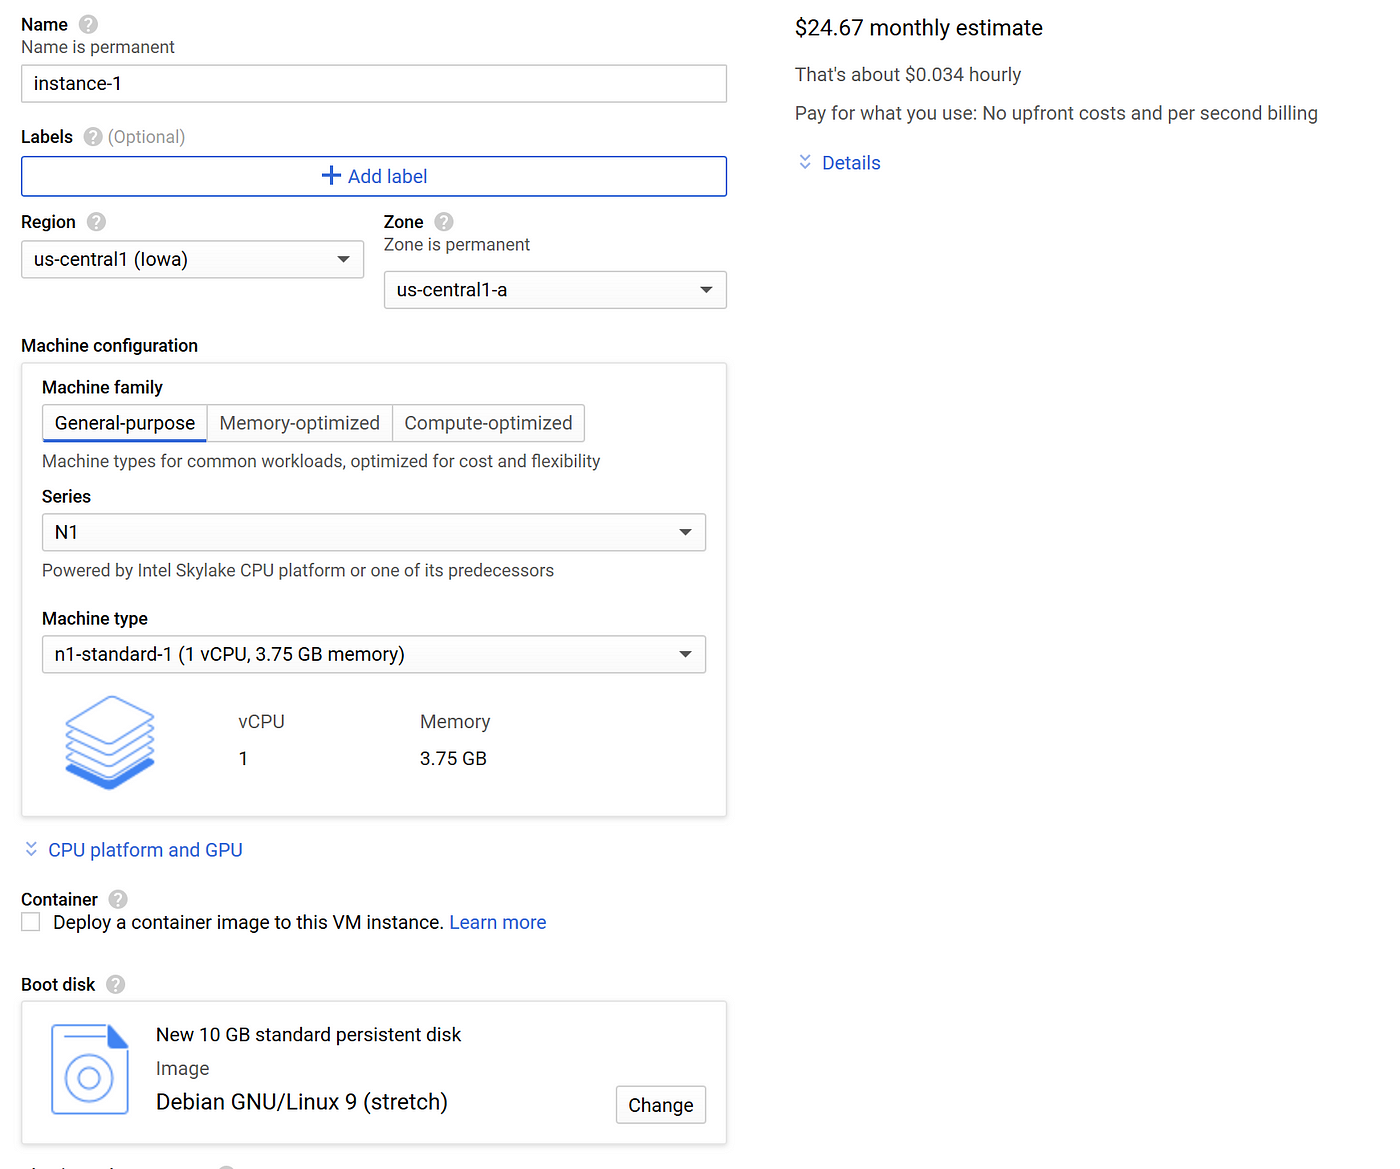
Ignore the price and everything for now. We are going to make a bunch of selections and the price will still say something when finished. Every account though is allowed one micro instance for free.
Things to setup. First, we must name our instance. Next we need to change Machine type to f1-micro. There should be one option. This will make changes to region, zone, and boot disk. You can make adjustments to all of these as you see fit but ensure you are in us-central region and the machine type stays f1-micro. If those change you will be billed for your virtual machine.
Once options are selected go ahead and create your instance and wait for it to finish.
During this time, if you are familiar with Google Cloud Platform you can change settings to meet your needs, if you aren’t, I recommend using this time to just browse through your options and read up on what the free tier includes. There is A LOT of things you can do.
Once our instance is complete we just click the SSH icon next to it. Your screen should look something like this:

If you added any extra keys or anything they are being copied over. Once we are logged in we need to do our usual house items such as updates and installation of packages.
$ sudo apt-get update && sudo apt-get -y upgrade && sudo apt-get -y dist-upgrade$ sudo apt-get install nginx certbotFrom here I recommend setting up ssh keys. You can generate them on your cloud instance or on your pi and copy them over. You just need to run
$ ssh-keygenAnd follow the on screen prompts. Your pi and cloud instance will need to share a key in order to perform ssh port forwarding we are going to setup. From here we need the key shared with our pi and added into the Cloud Console. If you don’t add to the Google Cloud platform the keys will not be persistent on your vm. To add them select the Metadata section under Compute Engine and then Select the SSH Keys tab to add your key.
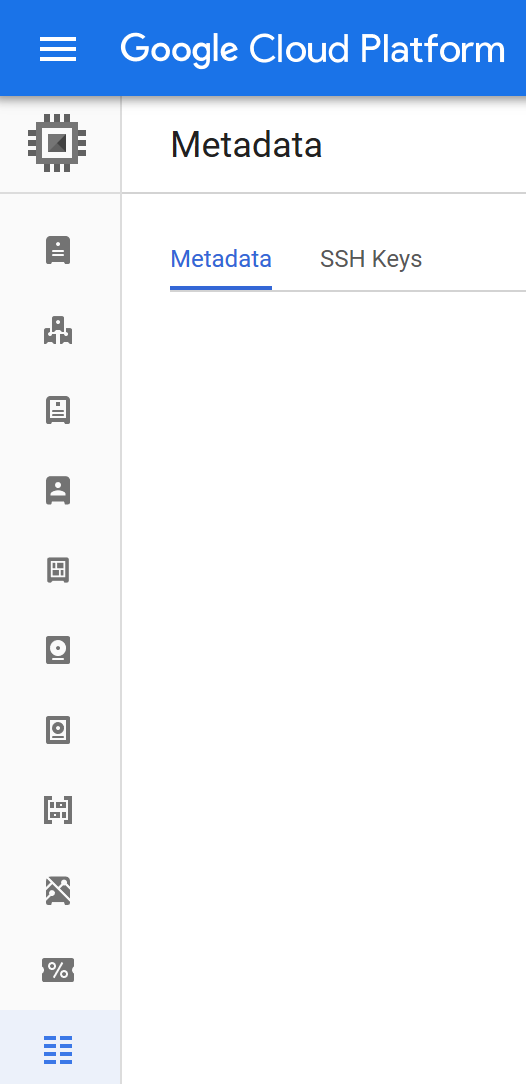
Now I’m going to hop over to our pi and configure AutoSSH.
$ sudo apt-get install autosshOnce we have this finished we need to ensure we can ssh over to our cloud instance from our pi with the key we generated. If this is not working, troubleshoot and come back. I know I had some spacing issues the first time adding the key to the metadata section.
Once ssh works we need to test autossh via command line. The command and options I used are:
$ autossh -M 0 -o "ServerAliveInterval 30" -o "ServerAliveCountMax 3" -R 10000:localhost:10000 user@instance -f -T -Nautossh -M 0 -o "ServerAliveInterval 30" -o "ServerAliveCountMax 3" -R 8080:localhost:80 user@instance -f -T -NAs you can see that is for forwarding my webmin port in the first command and the pihole port in second. We need to go over to our Google instance and verify ports are listening on localhost.
I do this with:
$ sudo netstat -antpI use sudo with those switches to see what process is running what. Anything outside your user will not show pid and process name.

And we are working!! Now let’s make autossh into a service so our pi will connect and maintain that connection. Back to the Pi!
$ cd /etc/systemd/systemHere we need to create two files for our two different autossh commands
You can name them whatever you want but mine are autossh-pihole.service and autossh-webmin.service. I’m going to just show one and you can then make the changes you need for the second.
$ sudo vi /etc/systemd/system/autossh-pihole.serviceThe contents of this file should look as follows:
[Unit]
Description=AutoSSH tunnel service pihole
After=network.target

[Service]
Environment="AUTOSSH_GAMETIME=2"
User=pi
ExecStart=/usr/bin/autossh -M 0 -N -o "ServerAliveInterval 30" -o "ServerAliveCountMax 3" -p 22 -R 8080:localhost:80 user@instance -i /home/pi/.ssh/id_rsa

[Install]
WantedBy=multi-user.target
You can place your ssh key wherever you like and use whatever user you like. I HIGHLY recommend using a non-shell, non-privileged user you create. That way if anyone is able to obtain the key and hit your pi they aren’t able to do anything with it. The same on your Google Cloud Instance. Maybe add a user called autossh with no shell. Anyway, once we have this file, save it and quit. Then create the one for webmin. One both are complete…
$ sudo systemctl daemon-reload
$ sudo systemctl enable autossh-pihole.service
$ sudo systemctl enable autossh-webmin.service
$ sudo systemctl start autossh-pihole.service
$ sudo systemctl start autossh-webmin.service
From here we verify services started ok with
$ sudo systemctl status autossh-pihole.service
$ sudo systemctl status autossh-webmin.service
If everything looks good we bounce back over to our Google Instance. First we verify that the ports are listening as expected. If so, we go to configuring NGINX!!
$ cd /etc/nginxWe need to create two files for our webmin and pihole services in the sites-available folder. We need to make sure they match either our IP address or FQDN. If you want DNS resolution you need to add A records in your DNS for your domain. For example my domain is b34rd.tech. I added two A records. One for pihole and one for webmin. So my files in sites-available are webmin.b34rd.tech and pihole.b34rd.tech.
$ sudo vim /etc/nginx/sites-available/webmin.b34rd.techIn here we need to add the following:
server {
    server_name webmin.yourdoain.com;
    listen 80;    location / {
        proxy_pass http://127.0.0.1:10000;
    }
}
For pihole we do similar:
$ sudo vim /etc/nginx/sites-available/pihole.b34rd.techserver {
    server_name pihole.yourdomain.com;
    listen 80;    location / {
        return 301 http://$host$request_uri/admin;
    }    location /admin {
        proxy_pass http://127.0.0.1:8080;
    }
}
No, we still don’t have SSL configured. BUT we can verify connectivity here.
$ sudo ln -s /etc/nginx/sites-available/pihole.b34rd.tech /etc/nginx/sites-enabled/$ sudo ln -s /etc/nginx/sites-available/webmin.b34rd.tech /etc/nginx/sites-enabled/$ sudo nginx -tIf you don’t receive output like this:

You need to verify syntax in your files.
Let’s start up nginx!
$ sudo systemctl enable nginx$ sudo systemctl start nginxHere we can browse to our cloud instance IP or our FQDN. We will be able to access our applications!
Now we need to secure them. Luckily with certbot this is simple!
$ sudo certbot --nginx -d pihole.yourdomain.com -d webmin.yourdomain.comThere will be on-screen prompts showing you status. Answer questions and select YES on redirect all to https. This will edit our config files for us to include all valid SSL certificates. We can restart nginx and verify this once again.
$ sudo systemctl restart nginxIf we are able to browse, are redirected to https we are almost done. We have one final step! Remember when I said we need some files from our CA. Here’s where they come in.
We need to copy the following from our CA to our Cloud Instance:
ca.crl
ca.crt
I put these files in the following locations:
/etc/ssl/client/ca.crt
/etc/ssl/client/ca.crl
You can put them anywhere you like but make sure you remember where you put them. We also need to copy the USER.p12 we created to our client machine. Whether that is a PC, Laptop, or Mobile we will need it.
Final edit. In our sites-available in nginx we need to add the following:
# Client Cert Config
ssl_client_certificate /etc/ssl/client/ca.crt;
ssl_crl /etc/ssl/client/ca.crl;
ssl_verify_client on;
I personally add this to the first server section in the files. My pihole config looks like this now:
server {
    server_name pihole.yourdomain.com;location / {
        return 301 http://$host$request_uri/admin;
    }location /admin {
        proxy_pass http://127.0.0.1:8080;
    }listen 443 ssl; # managed by Certbot
    ssl_certificate /etc/letsencrypt/live/pihole.yourdomain.com
    /fullchain.pem; # managed by Certbot
    ssl_certificate_key /etc/letsencrypt/live/pihole.yourdomain.com/privkey.pem; # managed by Certbot
    include /etc/letsencrypt/options-ssl-nginx.conf; # managed by Certbot
    ssl_dhparam /etc/letsencrypt/ssl-dhparams.pem; # managed by Certbot# Client Cert config
    ssl_client_certificate /etc/ssl/client/ca.crt;
    ssl_crl /etc/ssl/client/ca.crl;
    ssl_verify_client on;}
server {
    if ($host = pihole.yourdomain.com) {
        return 301 https://$host$request_uri;
    } # managed by Certbotlisten 80;
    server_name pihole.b34rd.tech;
    return 404; # managed by Certbot}
You will need to ensure you add this to your webmin file also and restart nginx one final time.
$ sudo systemctl restart nginx Now browse to your applications same as before. You will receive an error. Import your .p12 file into your client and browse again.
BAM! Certificate authentication for your applications!!
Future considerations..
So, as I said earlier using specific users for autossh is super important. That is the first thing I would suggest doing if you didn’t already do so.
Second, make nginx not disclose so much information. Setup custom error pages.
Third, add some CSRF and other security features in nginx.
Of course maintain patches and follow hardening guides for your pi and your cloud instance as well as nginx, lighttpd, and webmin.
Also, add some IDS/IPS tools to your cloud instance. At least install Fail2Ban