With the mining craze dying down, there are some amazing deals to be had on eBay and the used PC component market! Here’s what I built using some old hardware and $650. If you are trying to build the end all of password cracking systems, don’t look for used components. Look at bulk order pricing and comparing that to the prices for running something in AWS or Google Cloud.
First, I have to say, I don’t crack passwords during penetration testing. If hashes are found I will put them into a john cluster or hashcat to just see how strong they are based on my dictionaries but it isn’t something I go out of my way to do. It is really just for an assessment of password security. You can almost always just pass the hash around to get where you want to go.
Ok, now that I have that out of the way let’s talk about my setup and look at other options. I used my 2009 Mac Pro I previously talked about. It is running Arch and is setup as a Virtual Machine server and NAS. It has PCIe 1.0 and limited power resources. What can we do to solve that? Well, I just use a second power supply for one of the cards. I have a 500W 80+ gold EVGA power supply that is powering just one of my graphics cards. As for the cards, I was lucky on Craigslist. I found someone who was selling all their components for $625. It just so happened there were two Vega Frontier Editions in the mix. After driving to meet and filling up with gas I’d say it was about $650 for two very powerful compute cards, some SSDs, and a few other random components. If we are building the same I have, at least just for the hashcat part, we are looking for a Mac Pro 5,1 with 64 GB RAM and dual 6 core processors (mine was 4,1 but I flashed and upgraded components). As of publishing this auction is live and is essentially the exact same as my system.
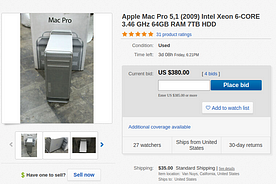

This system combined with shipping and my card purchase is $1065. If we add in an inexpensive external power supply we are looking at a total of ~$1100–$1150. That’s not bad but if you want just hashcat and machine learning, we can do better.
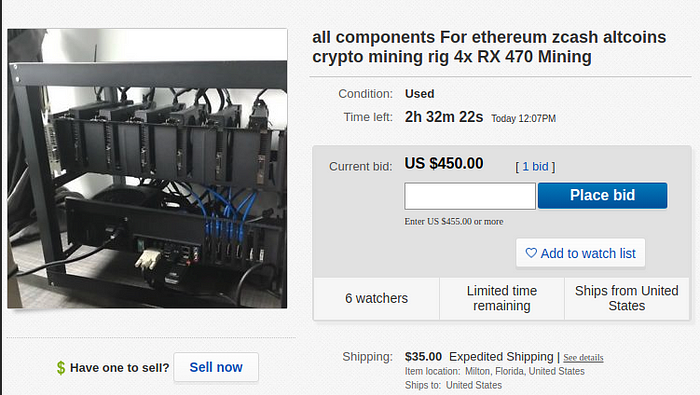
4 RX 480s for $450 with all components plus $35 in shipping. It may go up, it may not. Either way, that’s not a bad start.
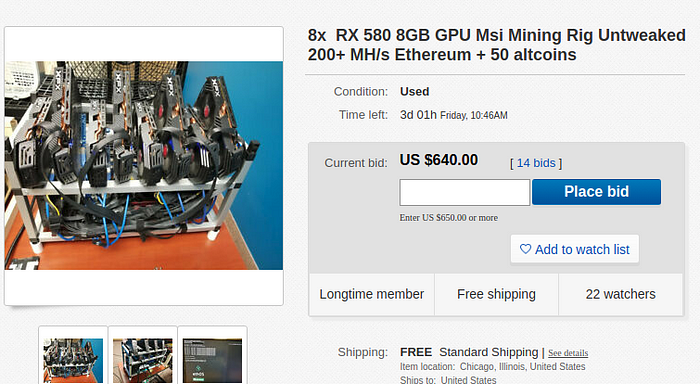
This one is 8 RX 580s for $650 and free shipping. Again, it may go up but still, just for the cards alone this is a great price!
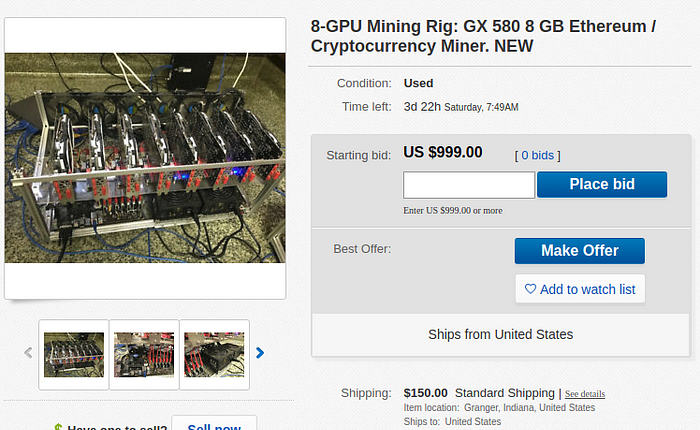
This is another RX 580 rig that is much more professional and has higher end components. I don’t see the price on this going up at all with the $150 shipping charge. I’d probably avoid this one.
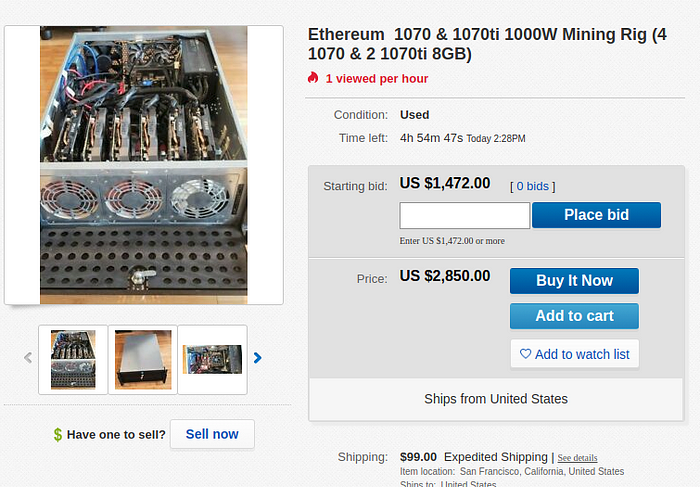
Now this, if purchased at no more than $1800 would be perfect. GTX 1070 and 1070 Ti cards. Unless using the newest RTX cards nVidia typically isn’t as fast as AMD when it comes to hashing or opencl workloads. That said, 6 of the cheapest 1070 cards on newegg.com would run just under $1800 alone.

This is just scratching the surface. You can search through all sorts of groups on social media, craigslist, LetGo, etc. There are a LOT of deals to be had and if you want to start doing some hashcat research or dive into machine learning this is the best and cheapest route to go. If you are someone who wants the newest for the best price, I’d look at what your specific needs are. For machine learning RTX cards from nVidia are the best. If you want to do a little bit of both hashing and machine learning maybe look at the Radeon VII. It is better than the RTX 2080 at OpenCL tasks but isn’t as great with tensorflow. If you are a gamer and want to do this stuff on the side, well, look at what games you play and go from there.
Ok, so, we found our rigs. Mine is an Arch Linux system with two Radeon Vega Frontier Edition cards. The rest of this guide will be focused more on AMD and Arch. If you are a Linux user, I 100% suggest Arch because of the amazing documentation and how up-to-date it is.
As I mentioned before, I already have Arch installed and if you’re interested in that setup check it out here:
The only things needed from this base installation is hashcat and Radeon Open Compute. The latter can be a a pain but I’ve tried to make it easier. You need to enable the Arch User Repository (AUR) and can install both from there. Hashcat is just the following:
$ sudo pacman -S hashcat hashcat-utilsIf you want to build the newest hashcat you can do so from AUR with the following:
$ pamac build hashcat-git hashcat-utils-gitOnce that is installed we will need to do a couple of things. First, we need to see if we have opencl-mesa installed and if we do, we need to see if it is actually needed. Some applications use it and won’t use the opencl we are going to compile. We can check with the following:
$ clinfoIf you don’t have clinfo we can just search in pamac or pacman
$ pacman -Ss opencl-mesaor$ pamac search opencl-mesaIf it is installed and needed, this isn’t an issue. We just want to verify. From here we need to begin installation of Radeon Open Compute. We first need to install the runtime.
$ pamac build rocm-runtimeThis may have some prerequisites and they can be installed the same way.
$ pamac build {required applications}This may take some time depending on your system but is the base we need before building ROCm OpenCL.
To install the Radeon Open Compute version of OpenCL we need to build it from source with a custom PKGBUILD. We can do this a few ways… we can use pamac and edit the PKGBUILD, or we can run pamac to get the build info and then download the PKGBUILD that is edited into the location.
$ pamac build rocm-opencl-gitIf you want to edit your PKGBUILD files, I have a copy here: https://gist.github.com/el-barbado/126aae6de40d079782746af637e94231
If you want to just download my PKGBUILD you need to run pamac to create your temporary folder and can just curl the file or wget it to the tmp location. By default this is /var/tmp/pamac-build-{username}/rocm-opencl-git.
You could also review the AUR for Arch here: https://aur.archlinux.org/packages/rocm-opencl-git/
This build takes some time as well. The PKGBUILD that I have linked fixes some of the prerequisite issues and will specify multi-threading based on system resources. It will make things run much quicker and actually fixes some bugs.
Once the build is complete we can run some benchmarks!
I have to run mine with sudo because I haven’t setup the correct group permissions for my user.
$ sudo hashcat --benchmark -m 1000 -O --opencl-vector-width 8If you have opencl-mesa installed you will receive an error about it with the command above. You just need to specify the platform:
$ sudo hashcat --benchmark -m 1000 -O --opencl-vector-width 8 --opencl-platform 2
This will be faster on a system that isn’t over 10 years old, running multiple virtual machines, and has PCIe v3.0, but it’s not bad for some testing.
Before we continue, I’m going to add my user to the correct group to not need sudo.
$ sudo usermod -a -G video $LOGNAMELet’s test our hashcat install on some actual hashes. You can use any wordlist you’d like. Let’s begin by making ourselves a new user on our system.
$ sudo useradd -M testWe specify -M to prevent the command from making a home directory. Let’s create a password and then grab the user’s hash and learn about it.
$ sudo passwd test

$ sudo grep test /etc/shadow 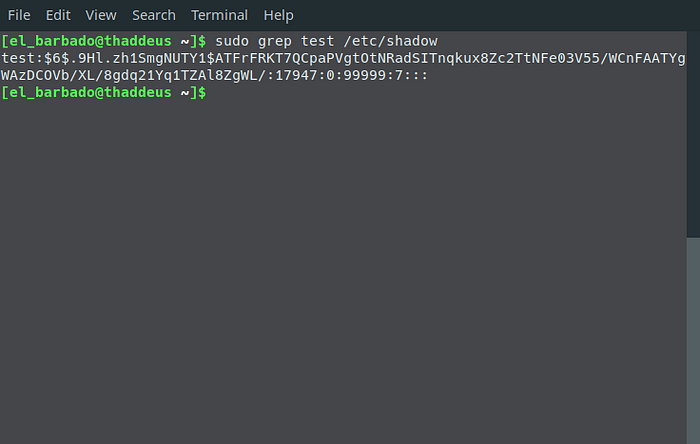
I set my password to ‘Pa$$w0rd’. It is simple for this example and we can crack it very quickly with hashcat.
test:$6$.9Hl.zh1SmgNUTY1$ATFrFRKT7QCpaPVgtOtNRadSITnqkux8Zc2TtNFe03V55/WCnFAATYgWAzDCOVb/XL/8gdq21Yq1TZAl8ZgWL/:17947:0:99999:7:::Looking at my hash, $6$ indicates SHA512. The characters after the $6$ up to the next $ are the SALT. For me, that is .9Hl.zh1SmgNUTY1. To further verify what type of hash storage is on our system, we can look at the hash configuration in /etc/login.defs
$ sudo grep ENCRYPT_METHOD /etc/login.defsThis returns SHA512 in my case. If you want more details you can view the entire file. Let’s take the hash from the user we created and put it in a file for hashcat.
$ sudo grep test /etc/shadow > test.hashUse your preferred editor to remove the username and colon following. We also need to remove the colons and extra characters at the end of the file. For me, the hash looks like this:
$6$.9Hl.zh1SmgNUTY1$ATFrFRKT7QCpaPVgtOtNRadSITnqkux8Zc2TtNFe03V55/WCnFAATYgWAzDCOVb/XL/8gdq21Yq1TZAl8ZgWL/We now need a wordlist. I prefer the rockyou list as a base but you can start wherever you’d like. To download the rockyou list go to skullsecurity.org or just
$ wget http://downloads.skullsecurity.org/passwords/rockyou.txt.bz2$ bunzip2 rockyou.txt.bz2We have our hash and our wordlist. Let’s crack it!
$ hashcat -m 1800 -a 0 -O --opencl-vector-width 8 -o found.txt --remove test.hash rockyou.txtLet’s break the command down a bit, -m specifies hash type, -a 0 tells hashcat we are doing a dictionary attack, -O tells hashcat to use the optimized opencl kernel, -o is output file, — remove will delete our hash from the original file.
Sometimes it can take a bit for hashcat to get started. For me it takes a minute or two to initialize everything. hashcat starting

Once it gets running though, it took no time at all.

With initialization and cracking it took less than 2 minutes.

Look at the output file specified, you will see the password. It will show the hash followed by the cracked password
$6$.9Hl.zh1SmgNUTY1$ATFrFRKT7QCpaPVgtOtNRadSITnqkux8Zc2TtNFe03V55/WCnFAATYgWAzDCOVb/XL/8gdq21Yq1TZAl8ZgWL/:Pa$$w0rdA few things to know. The -O option uses an optimized OpenCL kernel that will drastically reduce cracking time. It does have a drawback… any passwords over 8 characters won’t be found. To test on any password over 8 characters you need to remove the -O.
Now let’s move on to some Machine Learning. For this, I’m going to go over installing tensor flow (https://www.tensorflow.org).
Let’s begin by installing miopen. This is AMD’s Machine Intelligence Library.
$ pamac build rocblas

$ pamac build miopengemm

$ pamac build miopen
** rocblas must match the version of rocm you have installed. If you are running 2.0, rocblas must be set to 2.0 as well in the PKGBUILD file.
Once this compiles the kernels we can start our tensorflow install. There are three ways we can do this. We can compile from source, we can install via pip, via Anaconda, or we can use docker. I prefer docker because it is the easiest.
For pip you need to have python-pip installed.
$ sudo pacman -S python-pip

$ pip install --user tensorflow-rocm
For Anaconda we need to install it as well. You can go the full Anaconda route or the miniconda route. I prefer mini because I don’t need the full features.
$ pamac build miniconda3Once the build completes we just complete the onscreen instructions. From here we can install tensorflow-rocm.
$ conda install -c rocm tensorflow-rocmOnce installation completes we will need to add the anaconda python to our $PATH. By default this is /opt/miniconda.
For my favorite way, docker, we just need to follow the instructions here: https://hub.docker.com/r/rocm/tensorflow/
I’m not going to get too much into setting up docker and loading the container.
We are now ready to go!
I’m not going to get too much into TensorFlow here, I will have another blog post about it as well as Keras. Until then, check out documentation on tensorflow.org and see some of their tutorials.
Another fun machine learning tool is gym from OpenAi. This is much simpler to get started.
$ git clone https://github.com/openai/gym.git

$ cd gym

$ sudo pip install -e .
Here you can check out the README and the examples folder.
You could also install via pamac
$ pamac build python-gymThere is one other main machine learning library. It is called PyTorch. I haven’t used this much so I’m not going to go over installing it.
I will have another post on projects with Keras, TensorFlow and Gym.
Enjoy!