The Mac Pro circa 2009 is an amazing machine. The case is too damn beautiful to not show off and to be honest, the hardware isn’t a slouch either! It was and is a desktop server, with the dual Xeon processors from Intel and up to 128 GB of RAM (after you update the firmware) the machine can go a long way for a LONG time. I originally purchased this for development. At the time I was doing a LOT of mobile research on iOS and MacOS in general. The common denominator for testing and developing was the need for Apple hardware. The price tag in 2009 wasn’t too bad either, for $2500 I was able to score an Apple Display and the Mac Pro with an ATI Radeon HD 5770, Dual 2.26 Quad Core Xeons, and 16 GB of RAM. Even at 2009 prices, that’s a steal!
For easily two years this machine was a monster at every task I threw at it. Once I moved on to more Android-based security research I found MacOS was severely lacking. It was great for development but not for much else I did. This drove me to install Linux. I went with OpenSuSE because of the stability and how developer friendly it has always been (my opinion has since changed as I’m a die-hard Arch guy these days but that’s not the point here). Things were going great and research was rocking! Moving on another year or two life struck and kids happened. I was no longer able to spend evenings researching and the computer sat which brings me to today, 2018. I have a 9 (more like 10) year old computer that has the potential for new life. Here’s where we start…
My plan is to install Arch and make this beast into a KVM server. I’m going to upgrade the RAM to 128GB and host virtual machines for Node-Red, Web services, Motion, Home Assistant, Plex, NextCloud, and probably make one for a NAS, and possibly a few others. Let’s get started…
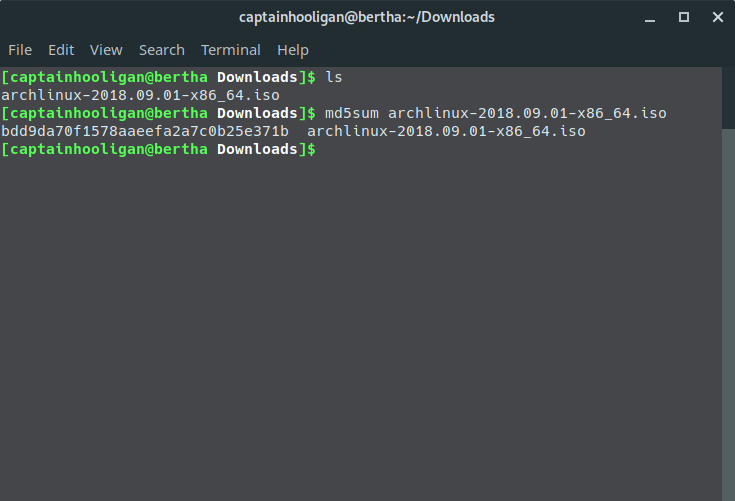
First, we need to get a copy of Arch. Head over to archlinux.org/download and grab a copy of the latest iso.

Make sure after you’ve downloaded you verify the hash.
Now we can either burn the iso to a disk or copy to flash drive. I prefer the flash route.
# dd if=/path/to/archlinux.iso of=/dev/my/usb/device bs=4M.Upon completion, plug into the Mac, hold the option key, and boot up!

It may take a bit for the screen to display but eventually, you will get some boot options:

Make sure you select the disc or the USB device you loaded your Arch iso onto. From here we are brought to a root terminal and can begin our install. For those who have never used Arch Linux in the past, the wiki is amazing. It is probably the BEST documented of any distribution of Linux and will help you in every way. Based on what you want to accomplish, the wiki will guide you through the remainder of the install. You can see it here: https://wiki.archlinux.org/index.php/installation_guide.
Now, we have network connectivity and have set our timezone. Time for us to get started. Since we’re going to install an LVM RAID, we need to turn on smartctl for our devices. Just open up your favorite editor (I prefer vim) and edit /etc/smartd.conf. I added the following lines for my devices:

Time to partition and set up our RAID. Depending on your version of Arch and fdisk, it may be different and since these drives have been used in the past, I’m just going to delete all partitions and set them up as Linux filesystem type. We need to make sure to create a ~200MB partition for EFI. When we make the EFI partition, set the type to 1, EFI. After this is created, execute “fdisk /dev/sdx” for your device and delete partitions (minus your EFI partition), create a new primary partition, and set the partition type, then finally write the changes. You will need to do this for every device you are adding to your LVM RAID.

Here is where I start doing things a little differently than the install wiki. Now, I use LVM on the array to setup volume groups… From there, we install our base system and continue. To do this we run
# pvcreate /dev/sdx, vgcreate VolGroup00 /dev/sdx. We will then verify everything with vgdisplay. After verifying we create our logical volume as raid 5 and use all the space available.


From here we mount everything and run pacstrap with our base package selection. First we mount our arch-root to /mnt and our EFI to /mnt/boot. This is accomplished by executing:
# mount /dev/VolGroup00/arch-root /mnt
# mkdir /mnt/boot
# mount /dev/sda1 /mnt/boot
We need to run pacstrap to get our base installed. You can add any package groups along with this command but I prefer to just install the base and then select individual packages with pacman in chroot step.
# pacstrap /mnt base 
Once complete, we generate our fstab.
# genfstab -U /mnt >> /mnt/etc/fstab’. Now we go into our chroot and finish up.
# arch-chroot /mntWe set our timezone, run hwclock, set locale, specify LANG and keymap. Then we configure networking and install our bootloader. These steps don’t differ from the Arch installation wiki until it comes to bootloader.
Since this is a Mac we need to install intel-ucode package. This package is microcode for the processor. The BIOS updates will sort this out for you but, we aren’t able to update our bios. This is super important for us especially after spectre and meltdown updates were released.

Let’s go ahead and install all the KVM packages and requirements. We need to verify the kernel installed supports virtualization. We can check with:
# lsmod | grep kvm
# lsmod | grep virtio
# zgrep VIRTIO /proc/config.gz 
From here we need to install the qemu package and libvirt package. I’m going with qemu-headless since this machine is going to run without a display and be managed remotely.

Once complete you will see a few additional packages suggested. If you feel the need for them, go for it. It all depends on your system. I installed samba as well as the qemu extras.

The last thing I’m going to do is create a general user and setup sshd. To add my user, run:
# useradd -m -g users -G wheel,storage,power -s /bin/bash username
# passwd username
# pacman -S sudo
# vi /etc/sudoers
# uncomment the line below:
%wheel ALL=(ALL) ALL
Next, we need to install openssh.
# pacman -S openssh
 - Next we edit our sshd config
# vi /etc/ssh/sshd_config
Here there are only a few things we need to specify, our listen address, listen port, users allowed, and to disable root login.
After we make our edits we enable the service…
# systemctl enable sshd.service


Now that we’ve finished all of this let’s setup the ramfs and our bootloader.
To begin we need to add some lvm items to /etc/mkinitcpio.conf.
# vi /etc/mkinitcpio.conf
 -- We need to add systemd and sd-lvm2 to the HOOKS section --
 -- We also need to add dm-raid raid0 raid1 raid10 raid456 to the MODULES section --
Once we save we can generate run:
# mkinitcpio -p linuxLastly, we install our systemd bootloader and configure it. This is done with two commands:
# bootctl --path=/boot install
# bootctl --path=/boot update
Reboot and enjoy!
Arch can be a bit intense for an install but it is well worth it when finished.
References: S.M.A.R.T. - ArchWiki S.M.A.R.T. (Self-Monitoring, Analysis, and Reporting Technology) is a supplementary component built into many modern… wiki.archlinux.org Installation guide - ArchWiki This document is a guide for installing Arch Linux from the live system booted with the official installation image… wiki.archlinux.org LVM - ArchWiki Virtual partitions allow addition and removal without worry of whether you have enough contiguous space on a particular… wiki.archlinux.org GRUB - ArchWiki GRUB (GRand Unified Bootloader) is a multi-boot loader. It is derived from PUPA which was a research project to develop… wiki.archlinux.org Microcode - ArchWiki Processor manufacturers release stability and security updates to the processor microcode. While microcode can be… wiki.archlinux.org EFI system partition - ArchWiki According to a Microsoft note[2], the minimum size for the EFI system partition (ESP) would be 100 MiB, though this is… wiki.archlinux.org Meltdown and Spectre Meltdown and Spectre exploit critical vulnerabilities in modern processors. These hardware vulnerabilities allow… meltdownattack.com KVM - ArchWiki KVM, Kernel-based Virtual Machine, is a hypervisor built into the Linux kernel. It is similar to Xen in purpose but… wiki.archlinux.org QEMU - ArchWiki When used as a machine emulator, QEMU can run OSes and programs made for one machine (e.g. an ARM board) on a different… wiki.archlinux.org