I was pondering the other day while pricing out parts for a new build about EK’s aluminum line and questioned to myself “Why don’t they have acrylic sides?”. After doing a bit of research I didn’t see a reason not to other than the fact the aluminum blocks aren’t as pretty with them compared to the nickel blocks. Maybe it’s because of UV lights effect on galvanic corrosion. I need to find out about the second one. I decided to give it a go!
For those who don’t know what galvanic corrosion is and why it is something important to think about when using aluminum, here are some links:
https://en.wikipedia.org/wiki/Galvanic_corrosion https://galvanizeit.org/design-and-fabrication/design-considerations/dissimilar-metals-in-contact
From the links in the rabbit hole I fell through, I saw some data suggesting UV light would accelerate things but I had to test it out for myself. My thoughts are if in a case, with indirect sunlight what happens?
First things first, I had to ensure my laser was functioning. I had a few hiccups along the way, I didn’t have the software installed, once I did get it installed I found the laser had a damaged lens, and finally, after replacing, I had to re-zero and re-calibrate the laser. Once all was done, I got to designing the acrylic.
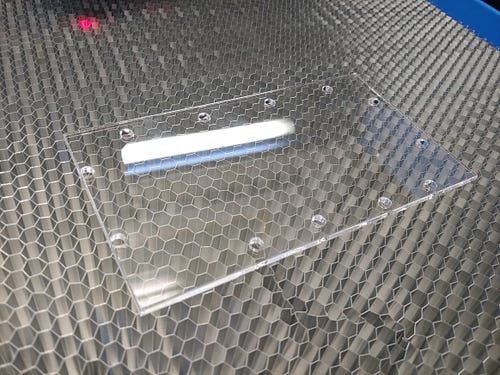
The acrylic wasn’t difficult at all to plan out. I just took the current block and some calipers and began measuring. Once all my references were documented I began drawing out the rectangle and screw holes. It took me maybe an hour or so to finish and refine all measurements for cutting. The laser was prepped and cutting began!
The cut came out nearly perfect! I was off 0.5 millimeters on two screw holes that I fixed quickly in the cut file. They weren’t off enough to prevent screws from threading and tightening, it was off just enough to make my perfectionist nature upset and force me to change it.
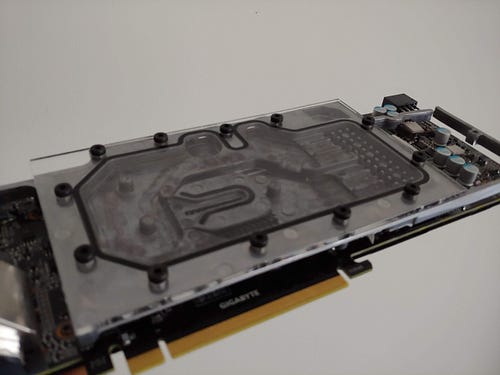
Installing was a breeze, even with the two holes that were off slightly. Everything connected up perfectly!


From here it was time to setup and plumb everything. The test bed is as follows: EK-AC GeForce GTX water block, EK-XRes Revo D5 pump/res combo, EK Cryofuel premix in clear, the custom cut acrylic, and flexible tubing. Temperature is climate controlled at 75 F with 56% humidity. The card is not functioning due to lightning damage and that suits this testing in case anything were to go wrong. Heat will be applied from controlled source at controlled times and for controlled duration.
So far so good and after weeks of testing, all temperatures have been consistent with before and there has been zero warping, leaks, or anything with the acrylic.